Picture this: you finally get that sleek walk‑in tub you’ve been dreaming about, only to discover a slow drip that turns your new oasis into a soggy nightmare.
In Fountain Hills, the desert heat and rocky soil can turn a simple installation into a money‑sucking trap if you skip the basics—like proper floor prep, correct plumbing alignment, and choosing a tub that fits your space without forcing awkward cuts.
Ready to dodge the common slip‑ups and enjoy a flawless, worry‑free soak? Keep reading and we’ll walk you through the exact steps to get it right the first time.
Assessing Your Space and Selecting the Ideal Walk‑In Tub Model
First thing’s first: grab a tape measure and walk the room like you’re scouting a battlefield. Know the exact length, width, and height of the area where the tub will sit, and don’t forget the clearance for the door swing and any nearby fixtures. A quick sketch on graph paper helps you see if the tub will fit without forcing a corner or cutting a wall.
Key dimensions to double‑check
- Floor‑to‑ceiling height – you need enough headroom for the door and the user.
- Width between walls – leave at least 2‑3 inches on each side for trim and waterproofing.
- Depth of the floor cavity – some models sit lower than others; know your floor’s thickness.
Next, match those numbers to a tub model that won’t make you compromise on comfort. Hydro‑jet, air‑massage, or classic soak? Each style carries a different weight, power source, and entry mechanism. In Fountain Hills, the extra weight of a stone‑filled tub can stress a slab that wasn’t built for it, so you may need a reinforced base.
Choosing the right model
- Weight capacity – verify the floor can handle the tub plus water and a person.
- Entry type – low‑step, side‑door, or top‑hinge; pick what feels safest for the user.
- Features you actually use – jets, heated backrests, handheld controls; avoid paying for fluff.
Floor Preparation: Leveling, Waterproofing, and Structural Reinforcement
First thing’s first—your floor has to be rock‑solid. In Fountain Hills the soil can shift, so a wobbly subfloor spells disaster. Grab a long level, walk it across the entire area, and note every high spot.
Leveling the Surface
Use a self‑leveling compound to fill low spots, then sand down any high points. Let it cure fully before you move on; rushing this step is a shortcut you’ll regret.
- Clean the area of dust and debris.
- Apply primer if the manufacturer recommends it.
- Spread the compound evenly, following the product’s instructions.
Waterproofing the Base
A leak under a walk‑in tub is a nightmare you can avoid with a proper membrane. Roll out a liquid‑applied waterproofing layer, overlapping seams by at least six inches.
- Seal all corners with a flexible caulk.
- Inspect for pinholes; patch them immediately.
- Allow the membrane to cure for the recommended 24‑hour period.
Reinforcing the Structure
Heavy tubs demand a sturdy deck. If your joists are spaced more than 16 inches apart, add blocking or sister boards for extra support.
- Check the load rating of your floor framing.
- Install additional joists where needed.
- Secure everything with construction‑grade screws.
Plumbing and Electrical Alignment: Ensuring Leak‑Free, Code‑Compliant Connections
Map the Rough‑In Before You Cut Anything
Start by tracing the existing drain and water lines on a clear floor plan. Measure twice, cut once—a misaligned pipe can become a costly leak that seeps into the desert sand beneath your home.
Use a laser level to verify that the tub’s drain port sits perfectly level with the floor flange. If the floor slopes, add a short PVC riser to bring the drain up to the proper height.
Water Supply: Hot, Cold, and Everything In‑Between
Most walk‑in tubs need both hot and cold feeds, plus a dedicated pressure‑balance valve. Install a shut‑off valve on each line so future maintenance won’t require tearing out the whole system.
- Run copper or PEX tubing through a wall chase that’s already sealed.
- Leave at least 2 inches of slack near the tub for thermal expansion.
- Secure all connections with pipe‑thread tape—no pipe dope needed for PEX.
Electrical Safety: Light, Jets, and Controls
Every walk‑in tub in Arizona must meet NEC 2023 Section 680. Verify that a GFCI breaker protects the circuit, and that all wiring is rated for wet locations.
Run a dedicated 120‑volt line to the tub’s control panel, keeping it at least 6 inches away from any water supply lines. Label the circuit clearly in your breaker box—future homeowners will thank you.
Installation Best Practices: Securing the Tub and Preventing Shifts
First thing’s first: the tub must sit on a rock‑solid base. Use a heavy‑duty steel frame or reinforced wood joists that match the manufacturer’s load specs. Double‑check that the floor is perfectly level before you even think about bolting anything down.
Fastening Techniques
- Pre‑drill holes through the tub’s mounting brackets; this stops the wood from splitting.
- Insert stainless‑steel lag bolts at every bracket point—don’t skimp on length.
- Apply a bead of silicone sealant under each bolt head to keep moisture out.
After the bolts are in, give the tub a gentle nudge. It should feel immovable, not wobbly. If there’s any play, slip in a shim made of pressure‑treated plywood until the tub sits flush.
Finally, seal the perimeter with a high‑quality, mold‑resistant caulk. Run a finger along the joint; you want a smooth, uninterrupted line. This not only stops water from seeping behind the tub but also adds a little extra rigidity to the whole assembly.

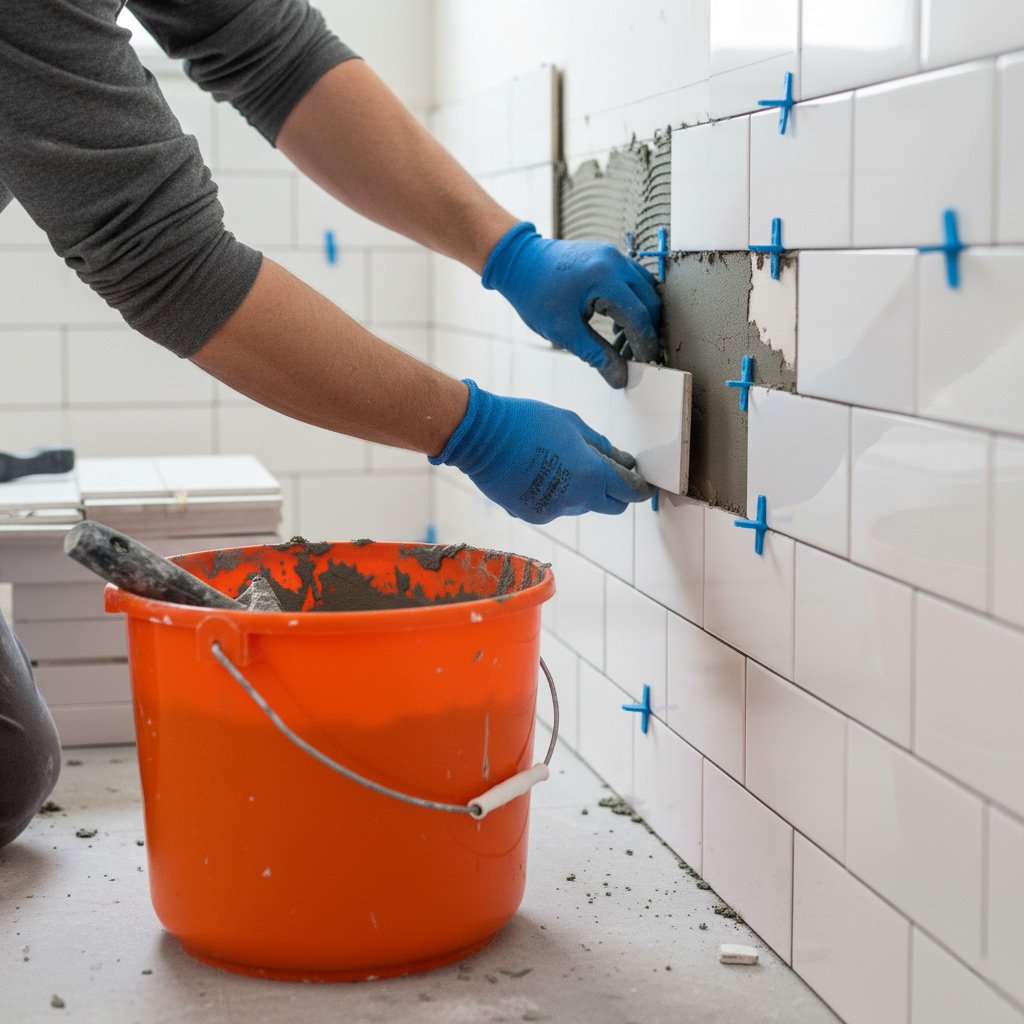
Finishing Details: Tile Work, Trim, and Accessibility Enhancements
Tile Work That Holds Up
Choose a slip‑resistant tile for the tub surround; the desert heat can make even a tiny sheen feel like ice. Waterproof the backer board with a liquid membrane before you even think about grout.
Lay the tiles in a staggered pattern to hide minor cuts. Leave a 1/8‑inch gap at the tub edge for a flexible silicone seal that won’t crack when the floor shifts.
- Use a polymer‑modified thinset for extra adhesion.
- Seal grout every six months to prevent staining from mineral deposits.
- Match the tile color to the bathroom’s palette for a cohesive look.
Trim and Edge Finishes
Metal or PVC trim protects the tub’s perimeter and gives a polished finish. Snap‑on trims are easier to replace if you ever need a new look.
Install the trim after the silicone has cured—usually 24 hours. This prevents the seal from being squeezed out and leaving gaps.
Accessibility Upgrades
Low‑profile handrails on either side of the tub give confidence to every user. Secure them to the wall studs, not just the drywall.
Consider a built‑in seat with a non‑slip surface; it doubles as a safety feature and a place to rest while you soak.
- Install a thermostatic valve to keep water temperature steady.
- Use a motion‑sensor light for hands‑free illumination.
- Place a non‑electric, waterproof call button within reach.
Case Study: A Seamless Walk‑In Tub Installation in a Fountain Hills Residence
Background
When the Martinez family decided to upgrade their master bathroom, they wanted a walk‑in tub that could handle the desert climate without turning their floor into a swamp.
Key constraints were:
- Limited floor space – the existing layout left only 5′ × 7′ for the tub.
- Rocky sub‑soil that demanded extra reinforcement.
- Need for a code‑compliant, leak‑free plumbing run that didn’t interfere with the home’s solar‑panel wiring.
Solution & Execution
Our crew started with a laser‑level survey, then poured a reinforced concrete slab topped with a 2‑inch waterproof membrane.
Next, we pre‑routed the plumbing using flexible PEX lines, aligning them perfectly with the tub’s inlet/outlet ports. The electrical conduit was tucked behind the wall studs, keeping everything tidy and up to code.
Installation day was a 2‑day sprint: day one for slab cure, day two for tub placement, tile work, and final trim. We used a temporary bracing system to keep the tub from shifting while the mortar set.
Results
The Martinez family now enjoys a drip‑free soak, even during monsoon‑season storms. The tub sits flush with the tile, and the reinforced floor has held up to years of heavy use.
They reported a zero‑leak experience and praised the quick turnaround—less than a week from start to finish. The project earned a 5‑star review on our site and a referral to two of their neighbors.
Final Words
When you walk into your new soak zone, you should feel confidence, not doubt. A walk‑in tub isn’t just a luxury; it’s a long‑term investment that pays off in comfort and safety. Get the right contractor, double‑check the prep steps, and you’ll avoid the costly “oops” moments that haunt homeowners in Fountain Hills.
Quick Checklist Before You Flip the Switch
- Confirm the floor is level, waterproofed, and can bear the tub’s weight.
- Verify all plumbing and electrical connections meet local code.
- Secure the tub with the manufacturer’s recommended fasteners.
- Seal tile work and trim to keep moisture out.
Keep this list handy, and treat each item like a non‑negotiable. If you’re ever unsure, reach out to a pro who knows the desert climate and the quirks of local building codes. For more tips on choosing and installing the perfect unit, explore our Walk In Tubs guide.
People Also Ask
What size walk‑in tub fits a typical bathroom in Fountain Hills?
Measure the available floor area and keep at least 24‑30 inches of clearance on each side for safe entry. Most standard models range from 48 to 60 inches in length, which works well in average‑sized homes.
Do I need a structural engineer to reinforce the floor before installing a walk‑in tub?
If the tub exceeds 250 lb when filled, a structural assessment is recommended to confirm the floor can support the load. Reinforcement may involve adding joists or a concrete slab, especially in older homes.
How can I ensure the plumbing connections meet Arizona code?
Use PVC or ABS pipe rated for hot water and follow the Arizona State Plumbing Code for venting and trap placement. Hiring a licensed plumber guarantees leak‑free, code‑compliant installations.
What waterproofing method is best for a walk‑in tub shower area?
A liquid‑applied membrane or a cementitious waterproofing board provides a seamless barrier against moisture. Apply the membrane to walls, floor, and any seams before tiling.
Can I install a walk‑in tub myself, or should I hire a professional?
DIY installation is possible for experienced remodelers, but improper leveling, waterproofing, or electrical work can lead to costly repairs. For most homeowners, hiring a certified installer ensures safety and warranty protection.
Fountain Hills Bathroom Remodel specializes in custom bathroom renovations, bringing over a decade of craftsmanship to homes throughout Fountain Hills, Arizona. Their team combines local knowledge with meticulous attention to detail to transform spaces into functional, stylish retreats.
Need Bathroom Remodel?
We deliver prompt, professional home repair and maintenance services throughout Fountain Hills and surrounding communities (85268, 85255, 85259, 85286, 85287), ensuring problems are resolved quickly and reliably. Our focus is on getting your home back to normal fast, without unnecessary delays.
Get Bathroom Quote