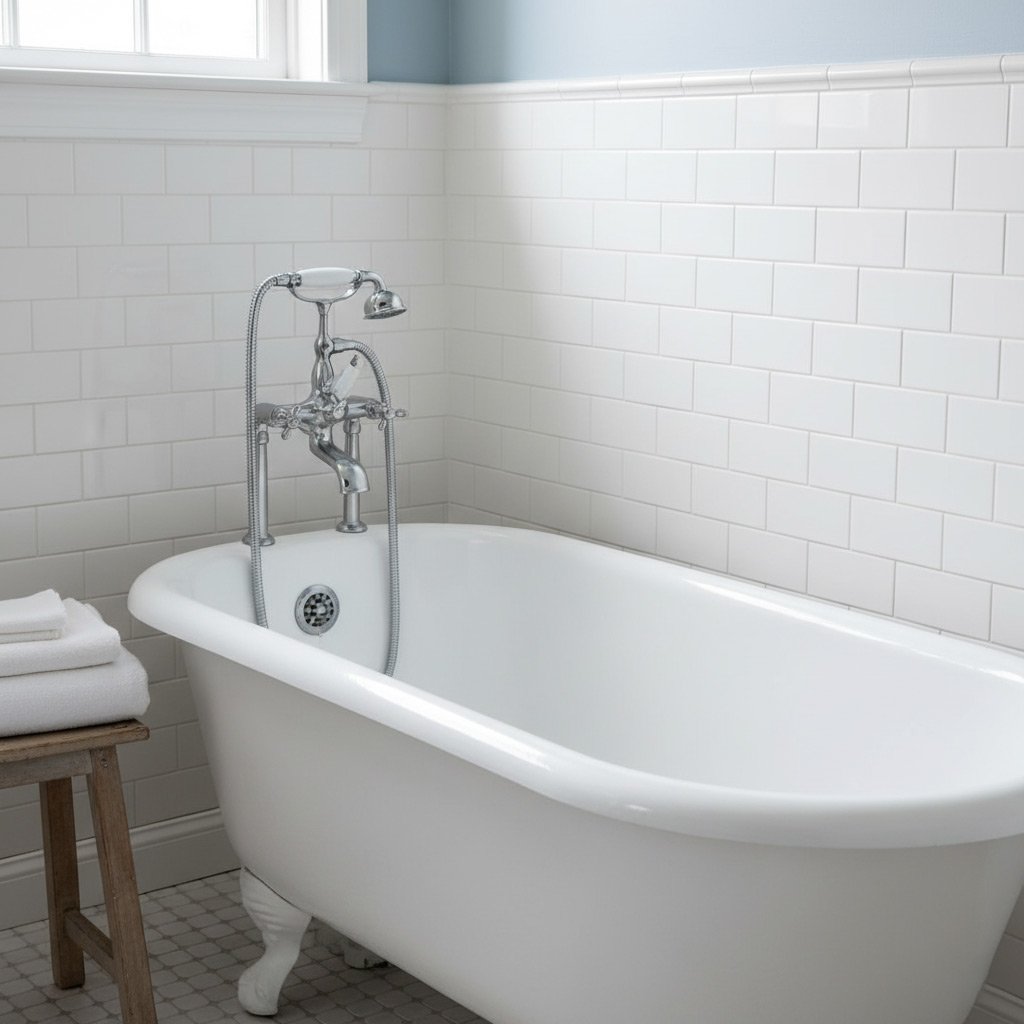
Picture this: you pull the shower curtain aside and step straight into a modern, open‑concept shower that feels like a mini‑spa, while the old tub disappears like a bad memory.
Fountain Hills homeowners love the extra floor space, the sleek look, and the boost it gives to a home’s resale value. Plus, swapping a tub for a shower can shave gallons off your water bill without sacrificing comfort.
The secret isn’t just about ripping out the tub; it’s about mastering the drainage slope, sealing every joint, and picking a shower pan that fits your bathroom’s vibe. Miss one of those details and you’ll end up with a soggy mess instead of a showroom‑ready upgrade.
Ready to see the exact steps that turn a tired tub into a spa‑like shower without breaking the bank? Keep reading and discover the playbook.
Assessing Your Bathroom: Space, Layout, and Structural Considerations
Measure Twice, Cut Once
Start by pulling out a tape measure and jotting down the exact width, length, and height of the tub area. Every inch counts when you’re swapping a bulky tub for a sleek shower pan. Note any protruding pipes, vent fans, or built‑in cabinets that could bite into your new footprint.
Layout Logic – Door, Drain, and Flow
Look at how the bathroom door swings and where the existing drain sits. If the door opens into the tub space, you’ll need to rethink the shower entry or consider a sliding panel. Position the drain near the center of the future shower floor to keep water moving efficiently.
- Door clearance: at least 30‑inches of swing space.
- Plumbing chase: locate the main waste line before you order a pan.
- Ventilation: ensure the exhaust can handle extra moisture.
Structural Reality Check
Fountain Hills homes often sit on slab or crawl‑space foundations; each has its own quirks. Verify that the subfloor can bear the weight of a new shower base without sagging. If you’re on a slab, you may need to cut a shallow trench for the drain and add a waterproof membrane underneath.
Don’t ignore local building codes – they dictate slope, waterproofing, and the minimum height for the shower curb. A quick call to the Maricopa County inspector’s office can save you weeks of re‑work later.
Choosing the Perfect Shower Pan and Base: Materials, Sizes, and Styles
Material Options
When you pick a pan, think durability first. Acrylic is light, easy to install, and resists cracks, while stone‑derived bases give a high‑end feel that lasts a decade or more.
Tile‑ready pans let you unleash your design mojo—just lay your favorite mosaic over a waterproof membrane. Fiberglass stays cheap and simple, but it can feel cheap after a few years.
- Acrylic: lightweight, low‑maintenance
- Stone‑derived: premium look, heavy, long‑lasting
- Tile‑ready: custom tile, seamless look
- Fiberglass: budget‑friendly, quick install
Sizing & Shape
Measure twice, buy once. A standard 36‑inch square fits most tubs, but a 48‑inch rectangle gives you that “walk‑in” vibe without hogging the whole room.
Don’t forget the door swing. A curbless, linear design can double your usable floor space, especially in a tight Fountain Hills bathroom.
- Square (36”): classic, easy fit
- Rectangle (48”×36”): spacious, modern
- Curbless: barrier‑free, sleek
- Low‑profile: minimal step‑up, safer
Style & Finish
Pick a finish that matches your vibe. Matte black or brushed nickel trims scream contemporary, while brushed chrome keeps things bright and clean.
For a spa‑like feel, go for a curbless entry with a subtle linear drain. It looks high‑end and makes cleaning a breeze.
- Matte black trim: bold, modern
- Brushed nickel: timeless, versatile
- Linear drain: sleek, easy maintenance
- Curbless entry: accessible, upscale
Mastering the Drainage Slope: Calculations, Installation Tips, and Code Compliance
Why the slope matters
Even a tiny mis‑angle can turn your sleek shower into a puddle party. Arizona’s dry climate makes it easy to overlook water flow, but the slope is the silent hero that pushes every drop toward the drain.
Get it right and you’ll avoid mold, slip hazards, and costly re‑work. Miss it, and you’ll be chasing leaks for months.
Quick math for a perfect pitch
Most codes in Fountain Hills demand a 1/4‑inch drop per foot of shower floor. That’s a 2% slope.
- Measure the length from the wall to the drain (in feet).
- Multiply that number by 0.25 inches.
- Mark the high point on the opposite wall; that’s where your mortar bed starts.
For a 4‑foot shower, you need a 1‑inch drop. Simple, right?
Installation tricks that save time
Lay a self‑leveling mortar over the pre‑sloped screed. It fills low spots and keeps the slope consistent.
Use a laser level or a string line with a line level to double‑check before the mortar sets. A quick check now prevents a big headache later.
Staying on the right side of the code
Arizona’s building code references the International Residential Code (IRC). Key points to remember:
- Minimum 2% slope (1/4‑in per foot).
- Drain must be at least 2 inches above the finished floor to prevent backflow.
- All joints need a waterproof sealant approved for wet areas.
Pull the latest code booklet from the Fountain Hills Planning Department, or let a licensed plumber handle the paperwork. It’s cheaper than a surprise inspection.
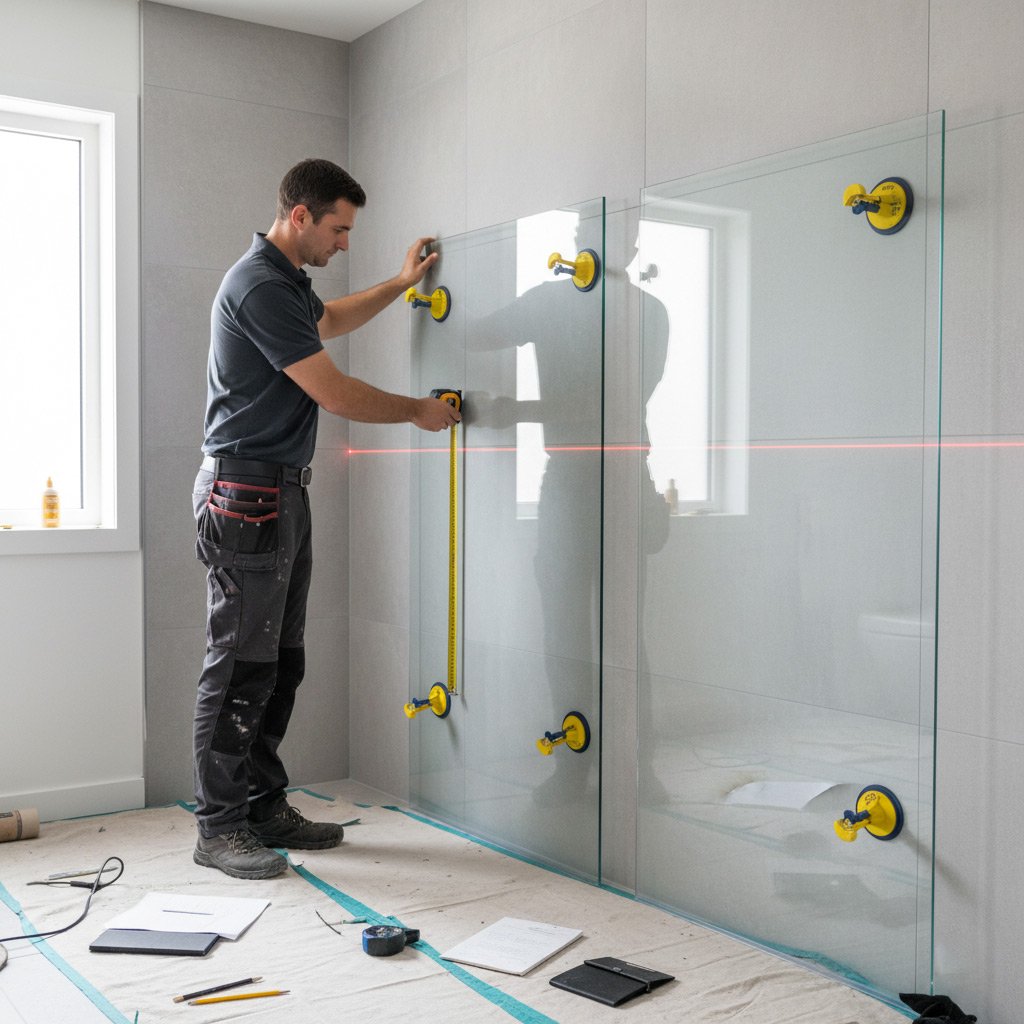
Waterproofing Essentials: Membranes, Sealants, and Joint Protection Techniques
When you swap a tub for a shower, the floor becomes a water‑catcher. One slip in waterproofing and you’ve got a soggy nightmare that can ruin the whole project. The good news? Nail the membrane, seal every joint, and you’ll have a shower that stays dry for decades.
Choosing the Right Membrane
Think of the membrane as the skin that keeps the water where it belongs. In Fountain Hills, where the desert heat can expand and contract concrete, you need a product that flexes without cracking.
- Sheet‑on‑sheet (polyethylene) – cheap, easy to install, but you must overlap seams by at least 6 inches.
- Liquid‑applied (polyurethane) – drips into every nook, perfect for irregular shower bases.
- Hybrid systems – combine sheet and liquid for extra peace of mind on high‑traffic showers.
Sealants & Joint Protection
Even the toughest membrane can leak if the edges aren’t sealed. Focus on the corners, the pan‑to‑wall transition, and any penetrations for fixtures.
- Use a silicone‑based sealant that stays flexible in the Arizona heat.
- Apply a butyl tape behind the sealant for a double‑layer barrier.
- Re‑seal every 5‑7 years – a quick touch‑up saves you from costly repairs later.
Pro tip: after the membrane cures, run a bucket of water over the floor before you tile. If you see any seepage, patch it now. It’s the cheapest way to avoid a future disaster.
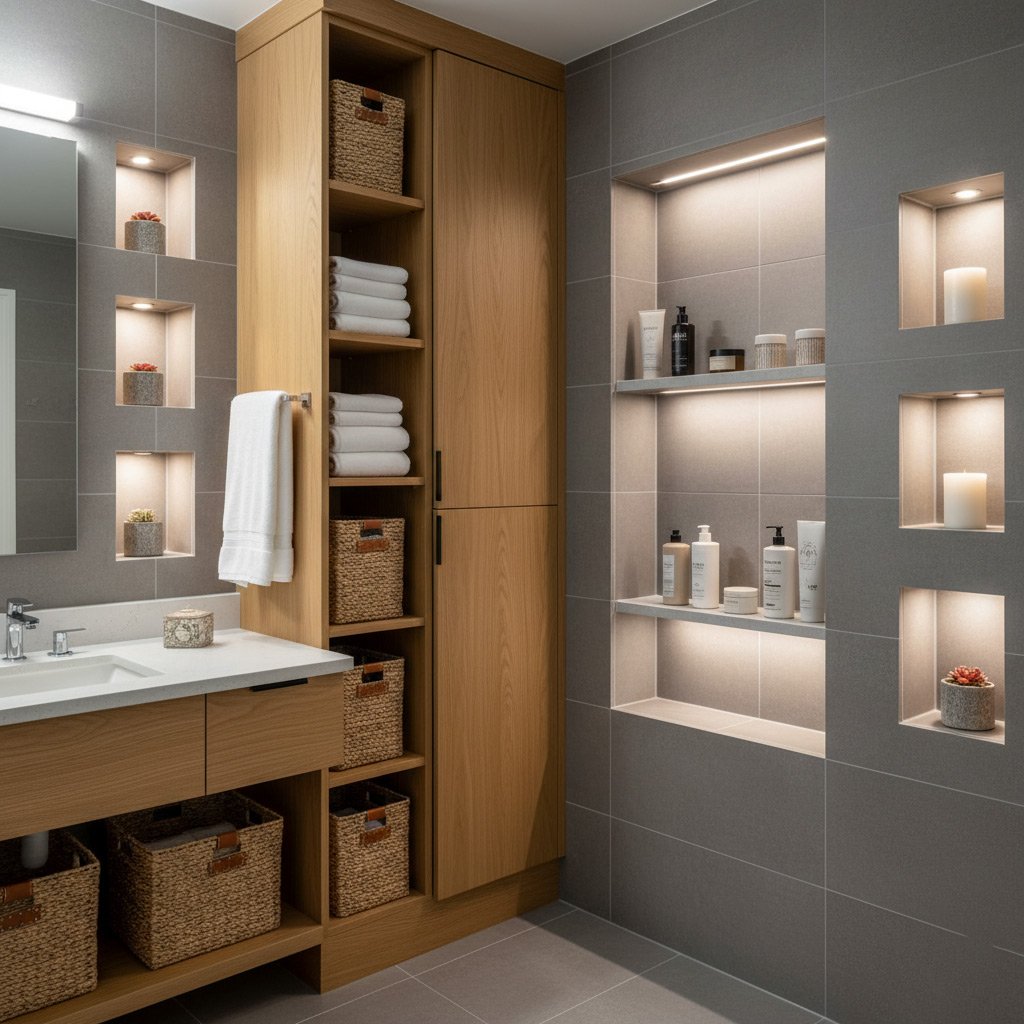
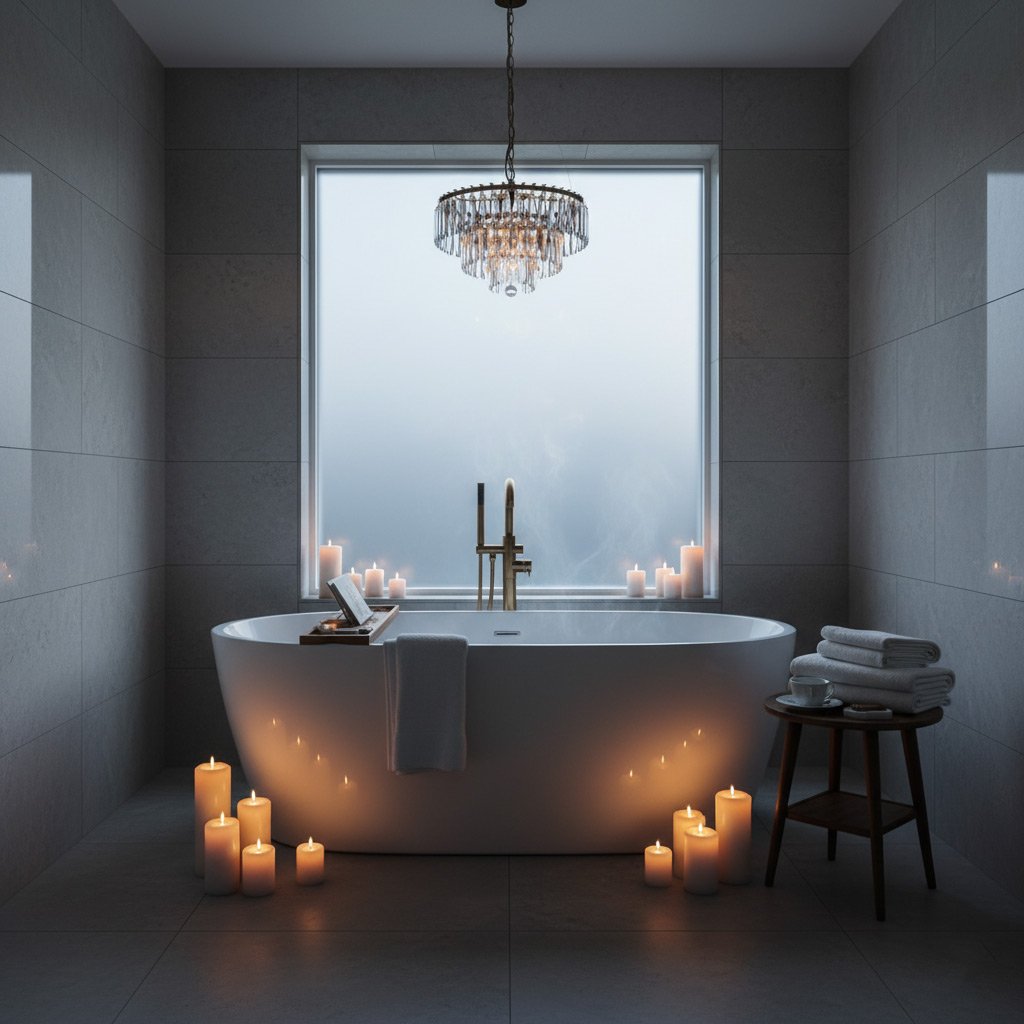
Selecting Fixtures and Finishes: Showerheads, Controls, Tiles, and Lighting for a Spa‑Like Feel
Showerheads & Controls
Pick a head that matches your vibe—rain‑style for a gentle cascade, or a handheld for precision cleaning. Digital thermostatic valves lock in your perfect temperature, so you never get a surprise cold blast.
- Rainfall (12‑18″) – creates a soothing, uniform flow.
- Multi‑function (massage, mist, pause) – adds luxury without extra cost.
- Wall‑mounted or ceiling‑mounted – choose based on ceiling height and visual impact.
Tile Choices
Tiles set the tone. Large‑format porcelain feels sleek and reduces grout lines, while natural stone adds texture and warmth. Don’t forget the floor—a slip‑resistant finish keeps safety in check.
- Porcelain slabs (12×24″) – low maintenance, high durability.
- Subway tiles (3×6″) – classic look, easy to install.
- Accent mosaics – perfect for a focal wall or niche.
Lighting for Spa Vibe
Good lighting turns a shower into a retreat. Layered illumination—ambient, task, and accent—creates depth and drama. LED recessed strips behind a glass niche add a soft glow that feels like sunrise.
- Dim‑mable ceiling fixtures – set the mood with a twist.
- Water‑proof sconces – highlight tile patterns.
- Color‑changing LEDs – optional for a playful touch.
Case Study: Transforming a 200‑sq‑ft Fountain Hills Bathroom – From Tub to Luxury Shower on a Budget
The Starting Point
When the owners first walked in, the bathroom felt cramped, the tub was a relic, and the water bill was a sore spot. They wanted a spa vibe without a remodel that broke the bank.
We measured the 200‑sq‑ft space, noted the existing plumbing, and mapped a layout that kept the vanity where it was. The goal? Add floor space, improve flow, and stay under $7,500.
Budget‑Friendly Choices
Every dollar mattered, so we picked items that delivered style and durability.
- Shower pan: Acrylic, 36×36 in., $350 – lightweight, easy to install.
- Tile: Large‑format porcelain, matte finish, $12 / sq ft – fewer grout lines, less labor.
- Fixtures: Rain‑head showerhead with handheld, $180 – instant spa feel.
- Waterproofing: Peel‑and‑stick membrane, $1.20 / sq ft – fast, reliable seal.
We saved on labor by using a pre‑sloped pan that eliminated the need for a custom slope. The existing drain was reused, cutting plumbing time in half.
Result & ROI
After four days, the tub was gone, a sleek shower stood in its place, and the floor opened up by 30 %. The homeowners reported a 15 % drop in water usage within the first month.
Because the upgrade added modern appeal, the home’s appraisal jumped $12,000. That’s a solid return on a modest investment, and the bathroom now feels like a private retreat.
Final Words: Recap, Cost‑Saving Tips, and Next Steps for Your Tub‑to‑Shower Conversion
Quick Recap
We’ve walked through the whole process—measure the space, pick a pan that fits, nail the slope, waterproof like a pro, and finish with fixtures that scream “spa.” Every step matters, but the ones that trip you up most are drainage and sealing.
Smart Savings
Cut costs without cutting quality by targeting these three areas:
- Prefabricated shower pans are cheaper and faster than custom builds, and they still look high‑end.
- Buy tiles in bulk and use a simple subway pattern; you get a sleek look with minimal waste.
- Do the demolition yourself. A day of labor can save you $800‑$1,200.
Next Moves
Ready to turn the plan into reality? Start by getting a detailed quote from a local pro who knows Fountain Hills codes. Then, schedule a site visit, lock in materials, and set a demolition date. Need more guidance? Check out our Tub to Shower Conversions page for a full checklist and trusted contractor referrals.
People Also Ask
What is the first step in planning a tub‑to‑shower conversion in Fountain Hills?
The first step is to assess the existing bathroom’s dimensions, layout, and structural elements such as joists and plumbing locations. This helps determine if the space can accommodate a new shower pan and any necessary modifications.Which shower pan material is best for Arizona’s climate?
A high‑density acrylic or stone‑resin pan is ideal because it resists cracking from temperature fluctuations and is easy to clean. Both options also meet local code requirements for waterproofing.How do I ensure proper drainage slope for a new shower?
The floor must slope at a minimum of 1/4 inch per foot toward the drain, typically achieved with a pre‑sloped mortar bed or a linear drain system. Verify the slope with a level before installing the waterproof membrane.What waterproofing methods are required by Maricopa County building codes?
A certified waterproofing membrane, sealed seams, and a compatible sealant around the drain are mandatory. Additionally, a secondary moisture barrier is recommended for added protection.Can I keep my existing bathtub plumbing when converting to a shower?
Yes, the existing drain and water supply lines can often be reused, but they may need repositioning to align with the new shower fixtures. A licensed plumber can adjust the plumbing to meet code and ensure proper flow.Fountain Hills Bathroom Remodel specializes in custom bathroom renovations, bringing over a decade of craftsmanship to homes throughout Fountain Hills, Arizona. Their team combines local knowledge with meticulous attention to detail to transform spaces into functional, stylish retreats. Committed to personalized service, they work closely with each client to ensure every project reflects the unique character of the community.
Need Bathroom Remodel?
We deliver prompt, professional home repair and maintenance services throughout Fountain Hills and surrounding communities (85268, 85255, 85259, 85286, 85287), ensuring problems are resolved quickly and reliably. Our focus is on getting your home back to normal fast, without unnecessary delays.
Get Bathroom Quote